Step 3: Reuse Your Assets and Build in Development
Reuse your existing deployment assets and keep the first version small: one deployment model, one target, and fixed non-secret values. Introduce customer-facing parameters after the baseline works.
Choose Your Deployment Strategy
The detailed onboarding tutorials live in Build by Deployment Strategy. Choose the specification that matches what you already have.
| What you already have | Recommended starting point |
|---|---|
| Container images or Docker Compose | Build from Compose, using Omnistrate extensions to the Compose format. |
| Source repository and Dockerfile | Build from Source Repository, which builds the image and generates or reuses a Compose specification. |
| Helm charts | Build from Helm Charts, with pinned chart versions, values, registry access, and endpoints. |
| Terraform or OpenTofu | Build from Terraform, with Omnistrate-managed state management. |
| Terraform plus Helm | Helm and Terraform in one dependency graph: infrastructure first, then charts consuming its outputs. Keep existing modules and charts. |
| Kustomize or raw Kubernetes manifests | Build from Kustomize, using Plan YAML referencing your Git revision and Kustomize path. Wrap raw manifests in a kustomization.yaml. |
| Kubernetes operators | Build from Kubernetes Operators, using the omnistrate-operator skill to map CRDs, controller scope, readiness, and lifecycle operations. |
For disconnected distribution, use the dedicated air-gapped Helm installer packaging path. For a product combining several services, see the multi-service product examples.
Build One Known Working Version
- Prepare the inputs. Pin image tags or digests, chart versions, and Git revisions. Identify dependencies, probes, ports, storage, secrets, and a simple application smoke test. Keep credentials out of the specification and Git; use the supported secret-management mechanism.
- Select the development environment explicitly. Confirm the configured environment name and type. For BYOC, confirm the designated AWS Control Plane account separately from the customer target. Check registry, Git, and Terraform permissions, and resolve Terraform state ownership before provisioning.
- Validate, build, and release a test version. Ask your agent to validate against the current schema, fix reported errors, and build with the correct specification type. Review the target environment and resource changes before execution.
- Complete target onboarding and deploy. For connected BYOC, finish customer account or cluster setup and wait for readiness. Create one test instance, verify
RUNNING, and smoke-test the application. For an offline target, generate and validate the installer instead.
Warning
Ask for human approval before creating billable resources, changing permissions, or deleting anything. Do not promote the first development build to production just to test it.
Build with the CLI
The build command reference describes the supported flags. Use the strategy tutorial for the correct specification type and artifact inputs.
For an Omnistrate Compose specification, a development build can look like this:
omnistrate-ctl build \
  --file omnistrate-compose.yaml \
  --product-name "My Product" \
  --environment "Dev" \
  --environment-type "dev" \
  --release \
  --release-description "Initial development baseline"
Replace Dev with your configured development environment name. Include --environment-type with --environment; do not rely on an implicit environment selection. --release makes the version available for testing. Preferred-version promotion and existing-instance upgrades come after the customer-journey tests in Step 4.
Automation and build behavior
- Keep the product name consistent when updating a product with a new specification.
- Include
--release-descriptionso the Plan version is easier to audit. - An unchanged rendered specification may reuse an existing Plan version. Use
--force-create-service-plan-versiononly when you explicitly need a new released version for identical inputs. - Changed Terraform or Helm inputs require a new Plan version to re-render artifacts, not a restart of an old workflow. See Workflows.
- For CI, use scoped, rotated secrets and the documented CLI authentication methods. Never commit passwords or tokens.
Build Using the Omnistrate Portal
If you prefer the web console, open Omnistrate to configure and inspect your product. Connect the appropriate account using Step 2.2: Cloud account onboarding, then use the product-building flow to bring a container image or Docker Compose specification. Use the deployment strategy guides for Helm, Terraform, Kustomize, and operators.
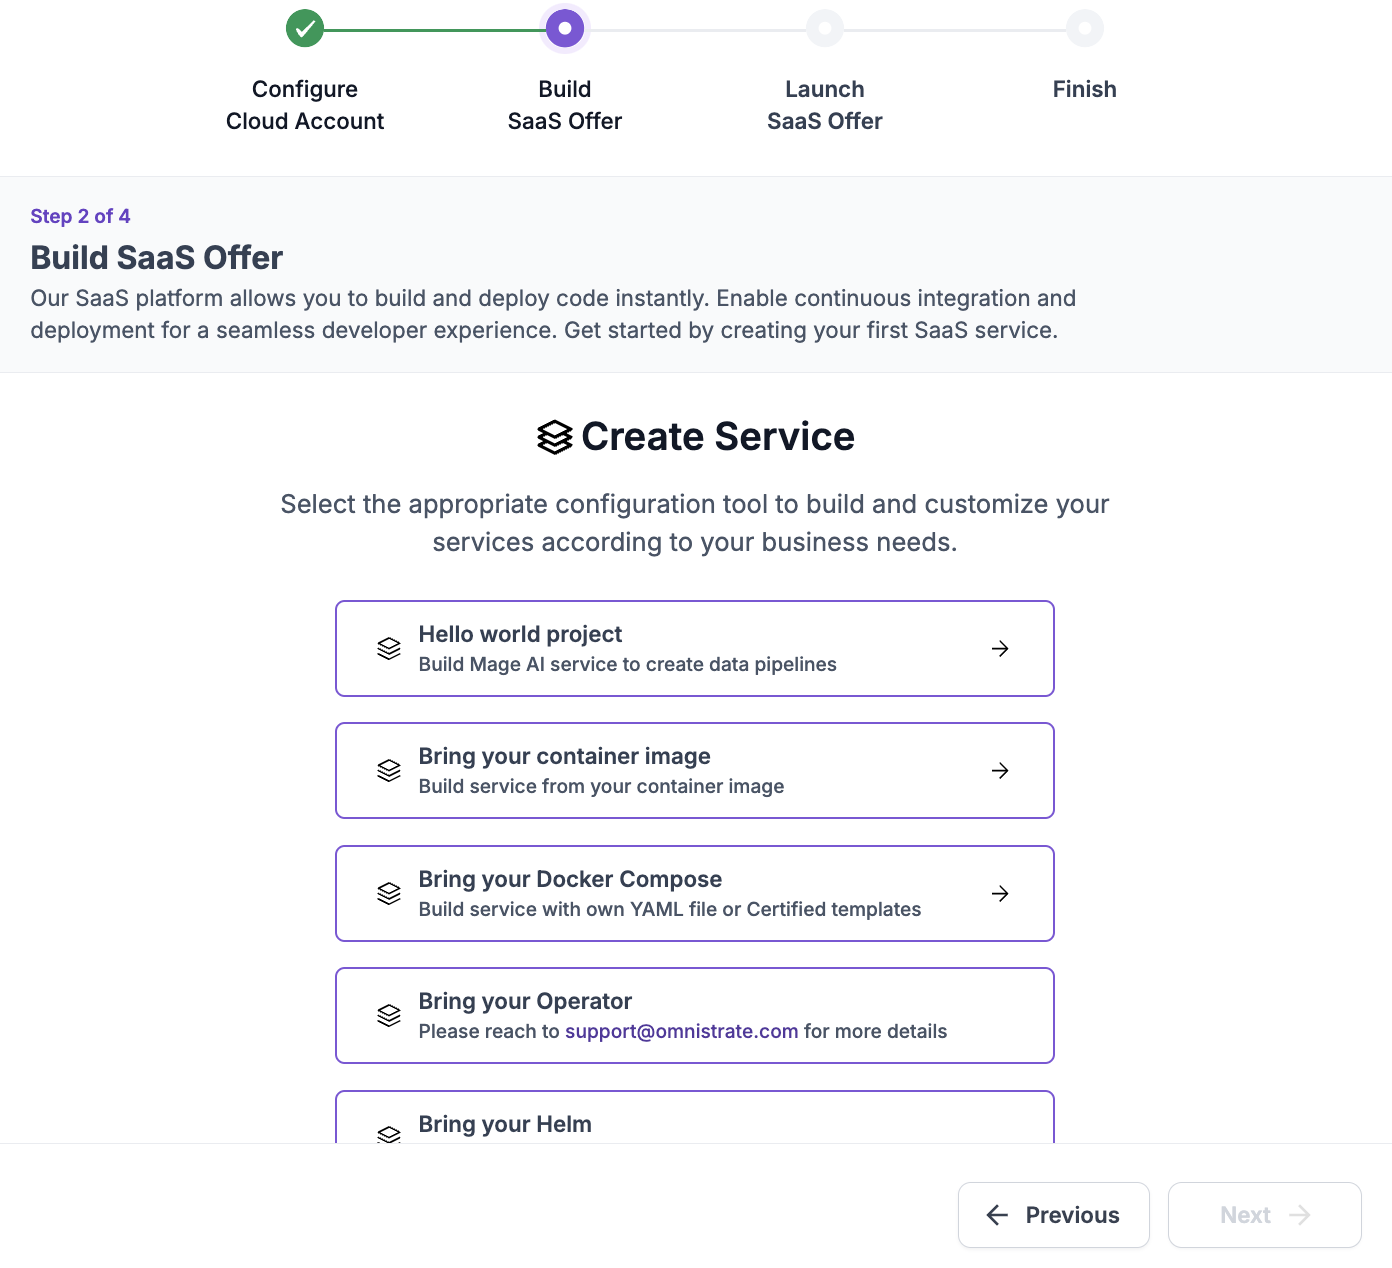
Review the resulting plan, environment, and deployment model before creating a test deployment. The portal and CLI are interfaces to the same product definition; they are not separate onboarding paths.
Build walkthroughs
These videos illustrate the workflow; use the current strategy guides and CLI reference for commands and configuration.
Next: Step 4: Test the customer journey and release process.