BYOC (Bring Your Own Cloud)
There are many applications that needs to be deployed in customers account due to security and cost reasons. Your customers may prefer to not move the data in your account and want you to deploy your app(s) in their account.
From your perspective, you will have to manage hundreds or thousands of these accounts. This is how the setup may look like:
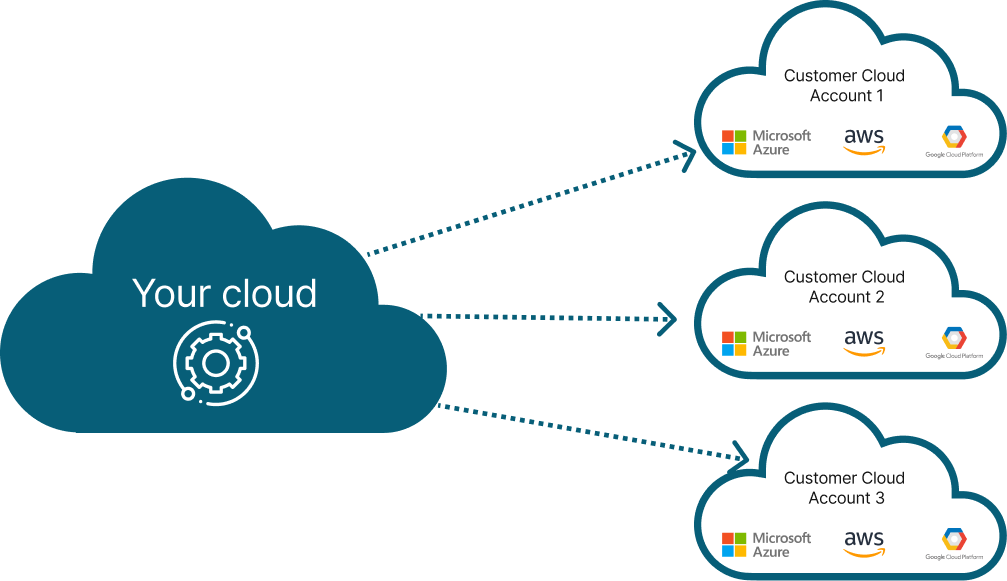
The challenge is that deploying in your customers account requires manual coordination, sharing of credentials and a lot of operational pain. We have automated the entire process and made it simple to operate in a secure way.
Note
There are several variants of BYOC mode in the industry and they are all somewhat related.
- Bring Your Own VPC - in this mode, your customer brings a specific VPC for you to deploy and manage your application. See here for more details
- Bring Your Own Cloud (BYOC) - in this mode, your customers bring their account so that you can deploy and manage your application. See here for more details
We support different variants of BYOC for you to NOT worry about the complexity of the underlying infrastructure
How to enable BYOC
Compose Spec Configuration
If you are using compose-based specification, you can add the following to your compose to configure your provider account:
x-omnistrate-service-plan:
  deployment:
    byoaDeployment:
      awsAccountId: "<AWS_ACCOUNT_ID>"
      awsBootstrapRoleAccountArn: arn:aws:iam::<AWS_ACCOUNT_ID>:role/omnistrate-bootstrap-role
Note
Please don't forget to replace
Videos
- To configure your customer's account using Cloud Formation, you need to follow this video guide
BYOC architecture
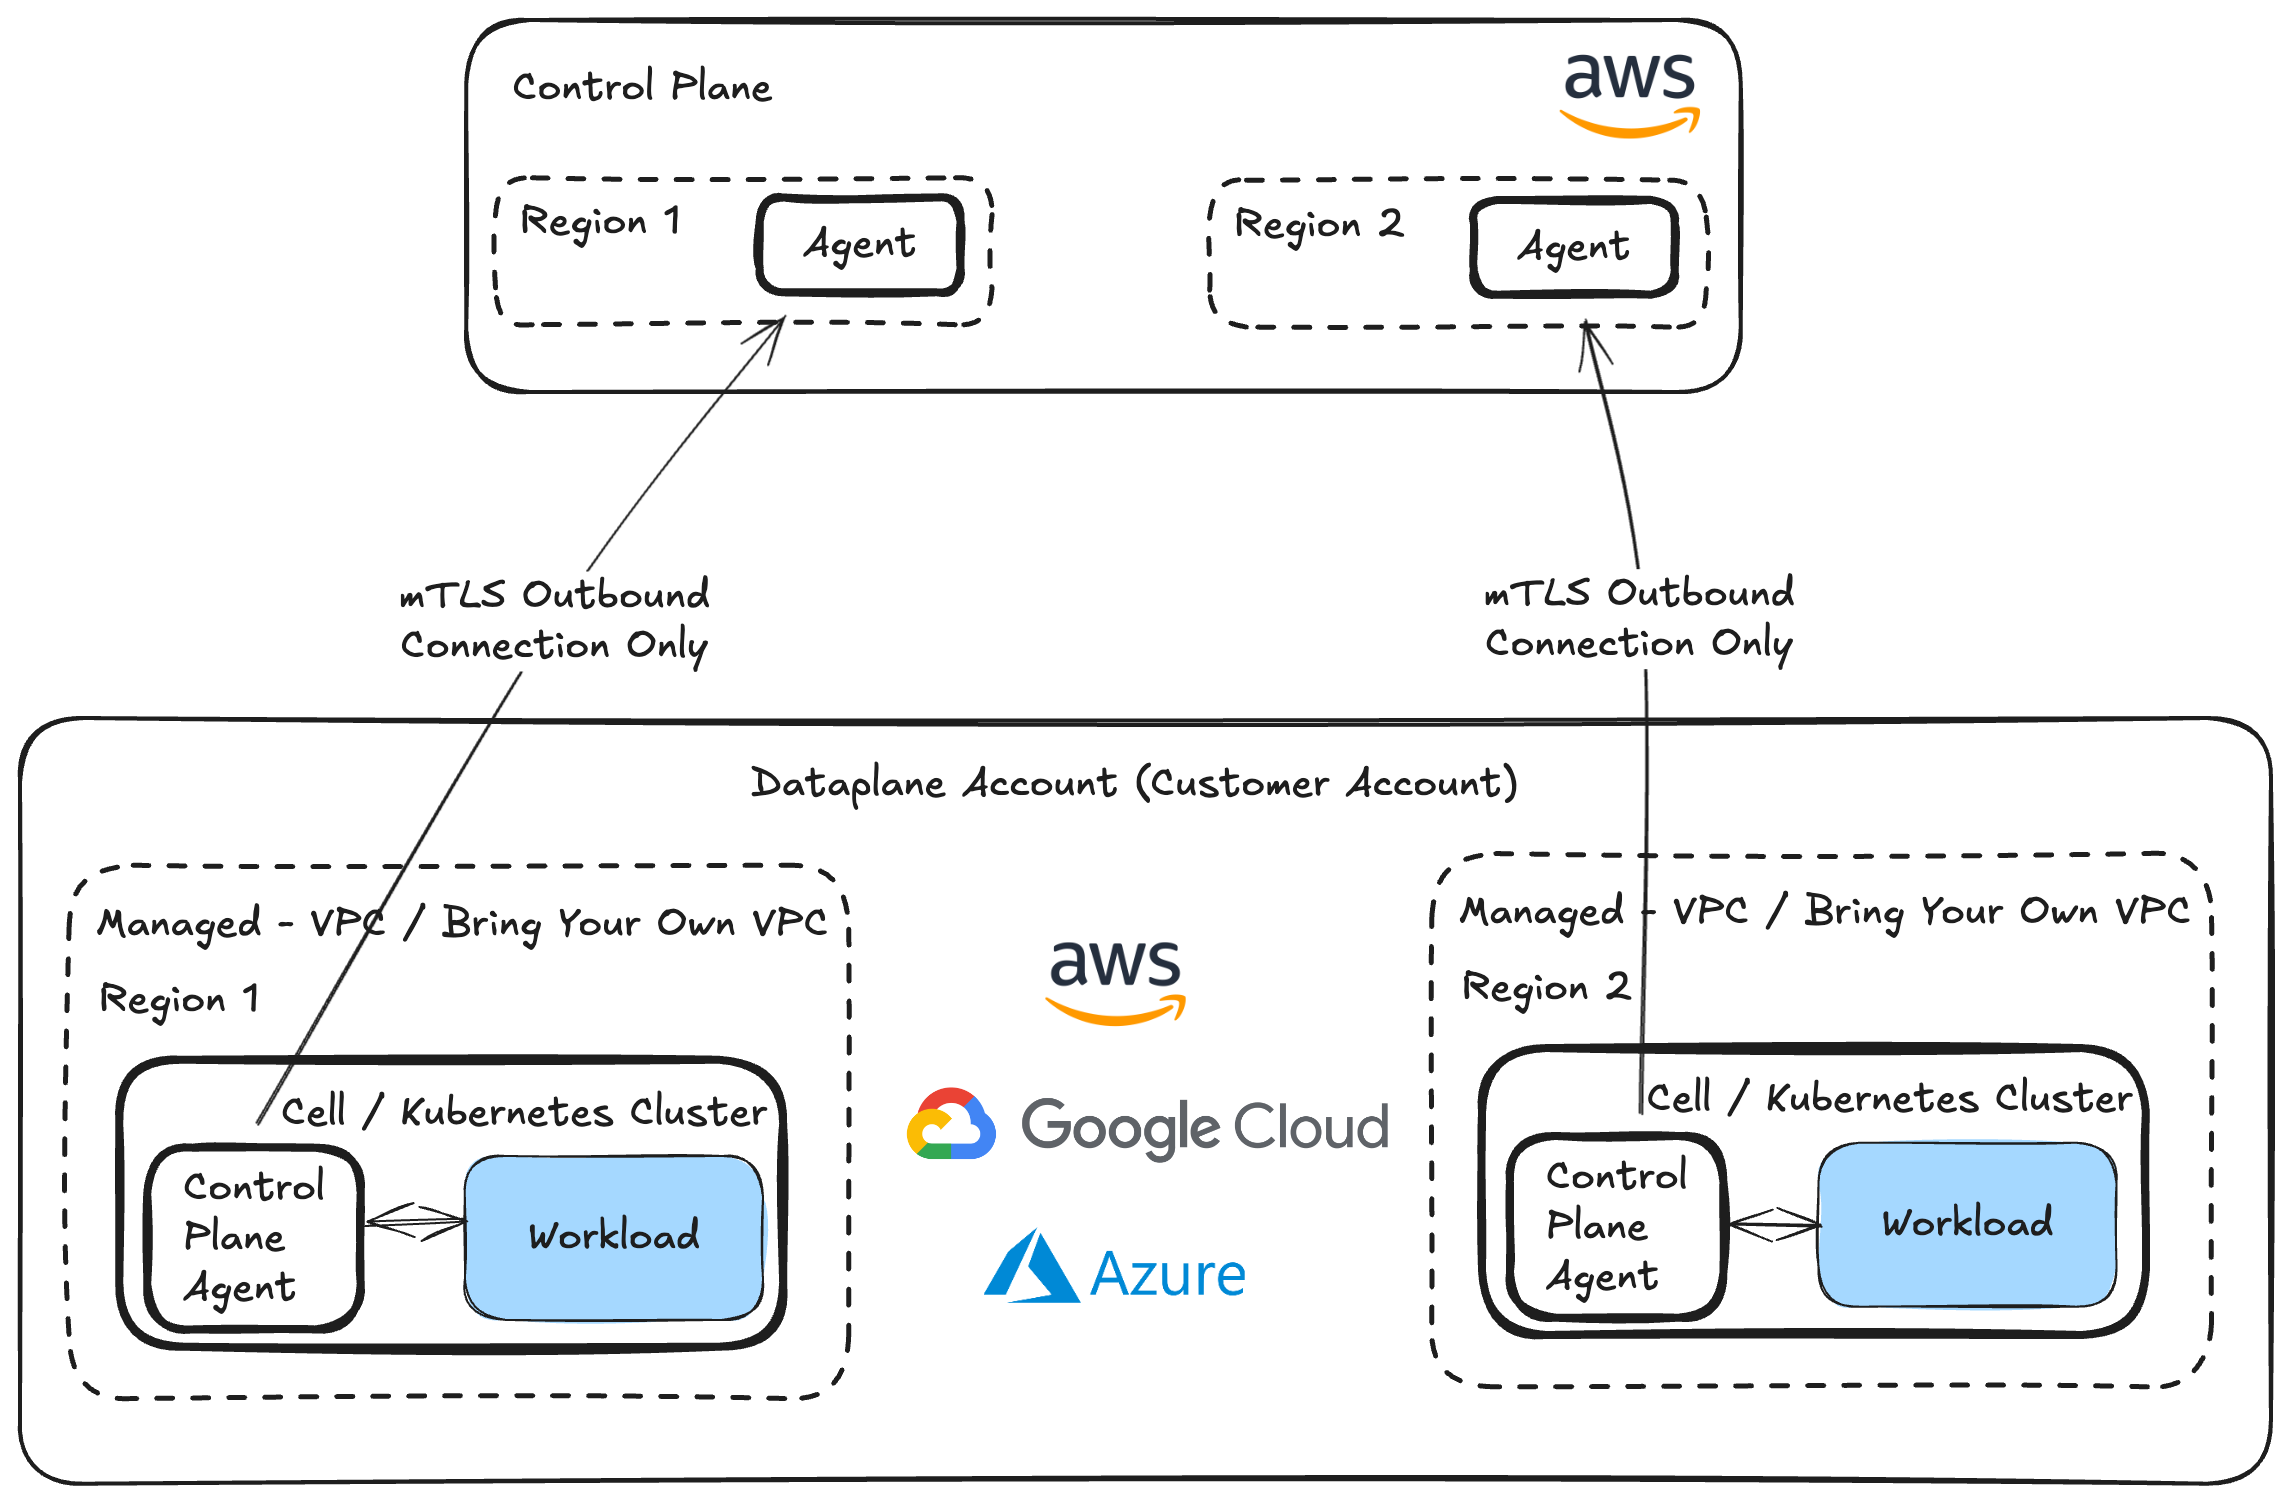
We build a trust relationship between your account and your customers account to allow you to automate the setup. Once setup, system uses the industry standard secure techniques to reverse the connection to prevent any inbound connections to your customers' account (except while configuring their account during setup), encrypted channel through TLS and oauth tokens to secure the connectivity between your customers account and your account.
If your customers wants to also disable any outbound data, they can also achieve that by updating the IAM permission set. Please reach out to support@omnistrate.com for details on how to achieve this.
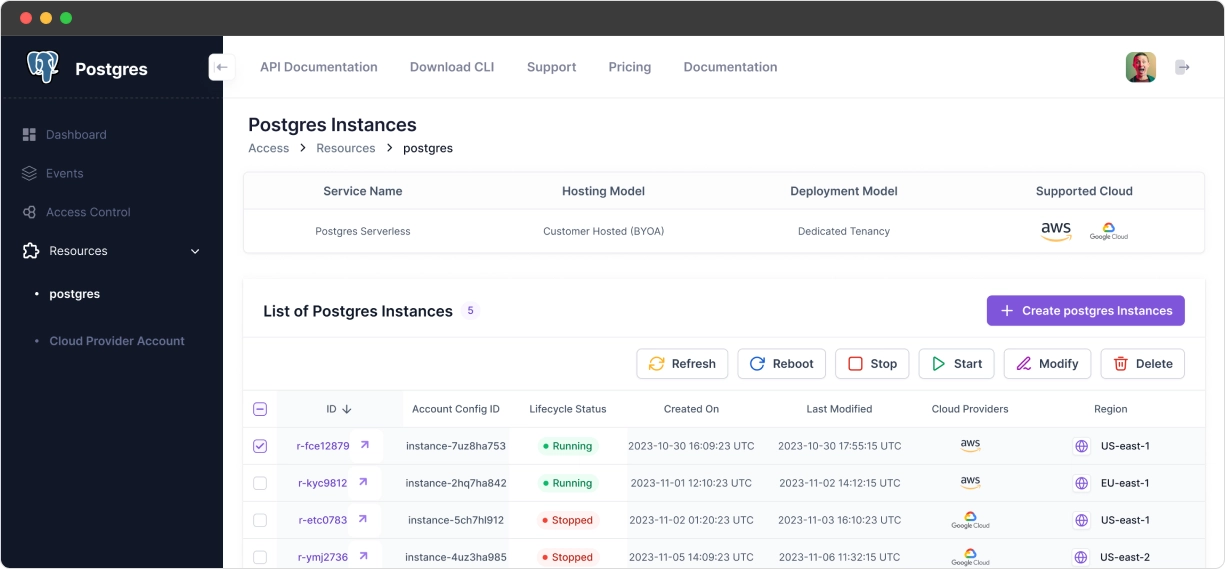
BYOC in action
Omnistrate makes it easy to manage resource instances across the fleet
View for your customers
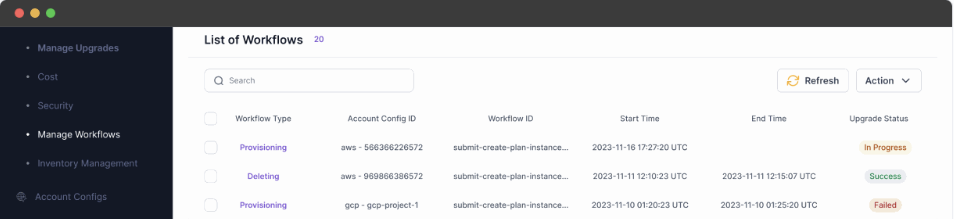
Internal view for your teams
Demo video
Here is a demo video on PostgreSQL BYOC DBaaS: 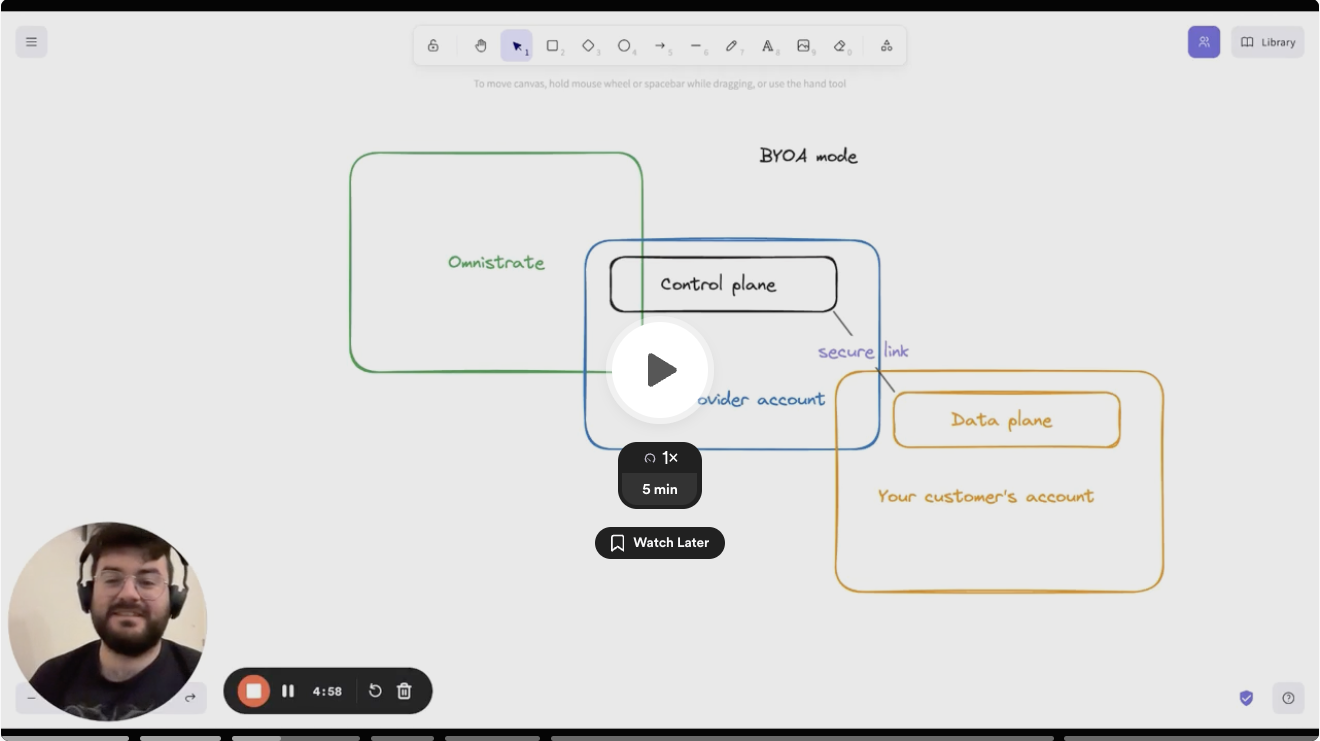
Bring Your Own VPC (BYO-VPC)
If you are running in BYOC mode, your customers can bring their own VPC/VNet and Omnistrate will deploy your Dataplane in their existing network infrastructure.
AWS prerequisites
To use BYO-VPC on AWS, your customer has to first create the VPC and subnets with the following requirements:
- The VPC needs to enable DNS hostnames and DNS resolution, please refer to this page
- Public NAT gateway is required in the VPC to pull Container Image from repository, also make sure all private subnets route tables have an entry to this NAT gateway, please refer to this page
- The public subnet needs to have auto-assign public IPv4 address enabled, please refer to this page
- All private subnets need to have tag
kubernetes.io/role/internal-elbwith value1and public subnets need to have tagkubernetes.io/role/elbwith value1, please refer to this page
GCP prerequisites
To use BYO-VPC on GCP, your customer has to first create the VPC and subnets with the following requirements:
- VPC Configuration: The VPC must exist in the target GCP project
- Subnets: At least one subnet must exist in the target region
- Secondary IP Ranges: Subnets must have secondary IP ranges configured for GKE:
- A range for GKE pods (recommended: minimum /16 CIDR, e.g.,
10.1.0.0/16) - A range for GKE services (recommended: minimum /20 CIDR, e.g.,
10.2.0.0/20) - Refer to GCP documentation on subnet secondary ranges
- Private Google Access: Should be enabled on subnets to allow GKE nodes to access Google APIs without external IPs, refer to this page
- Cloud NAT: Required for outbound internet connectivity (e.g., pulling container images). A Cloud Router must be created first, then Cloud NAT is attached to it. Refer to this page
Example commands to create a complete GCP network for BYO-VPC:
# 1. Create the VPC (custom mode — do NOT use auto mode)
gcloud compute networks create customer-vpc \
  --subnet-mode=custom

# 2. Create a subnet with secondary IP ranges required by GKE
#    Names "pods" and "services" are recommended; any two names are accepted
gcloud compute networks subnets create customer-subnet \
  --network=customer-vpc \
  --region=us-central1 \
  --range=10.0.0.0/24 \
  --secondary-range pods=10.1.0.0/16,services=10.2.0.0/20 \
  --enable-private-ip-google-access

# 3. Create a Cloud Router (required by Cloud NAT)
gcloud compute routers create customer-vpc-router \
  --network=customer-vpc \
  --region=us-central1

# 4. Create Cloud NAT on the router
gcloud compute routers nats create customer-vpc-nat \
  --router=customer-vpc-router \
  --router-region=us-central1 \
  --nat-all-subnet-ip-ranges \
  --auto-allocate-nat-external-ips
Note
The secondary IP range names pods and services are the recommended convention. If your ranges use different names, Omnistrate will automatically use the first two secondary ranges on the subnet — the first as the pods range and the second as the services range.
How to get started
When creating an instance, your customer can specify their VPC/VNet identifier as the value of cloud_provider_native_network_id input parameter:
- AWS: VPC ID (e.g.,
vpc-1234567890abcdef0) - GCP: VPC name (e.g.,
customer-vpc)
The rest of the experience will be the same as regular BYOC deployment.